Getting Tanked

 Intro
Intro


How many classes do you get to break hammers in? Yeah, that's why this class is the best.

Found this part of the assignment incredibly challenging! What was really different about this assignment was that we set our own parameters and we had to define our own methods of forming the metal. Normally we had "Daniel's method" or "Martin's Method" or "Gabe's Method" on how to make our assignments but now we really had to devise our own. Essentially this resulted in a lot of a restarts and much experimentation.
So, this is how I went
The Tank
As a group we had to makes some files for laser cutting using Slicer. They would then be taken and assembled resulting in a shape we could model around.
Btw we ended up making three different tanks because
1. the slots were too thin
2. The slots were too big (but we hot glue gunned it and taped it up to be our rough)
3. Just right (video below)
Btw we ended up making three different tanks because
1. the slots were too thin
2. The slots were too big (but we hot glue gunned it and taped it up to be our rough)
3. Just right (video below)
Here's a video of 30 minutes of my life sped up to 21 seconds
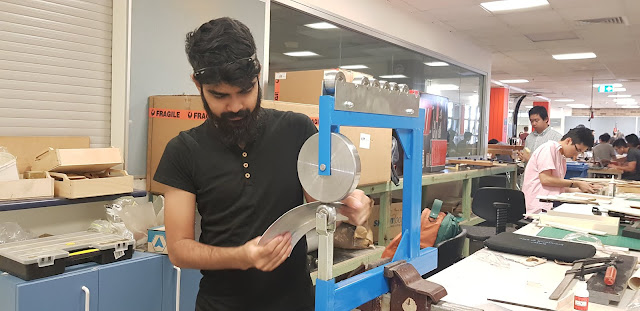
Now let's begin the actual forming of the metal.
Cut the sheet metal to shape.

Self explanatory.... moving along


Next step involved marking up the general outline that we anticipated (I learnt the hard way, that if you use have too much material at the start, the metal Is too hard to form - that was restart 1).
Then I used the roller, to get the general shape (don't roll too hard - because then it'll distort too much .... that was restart 2)

So now this is where I brought the project back to the shape to start forming. This is where the nightmare starts.
Using the sandbag, I started the shape the back bend. I got the basic shape really quickly but it needed more work.


Second shot for more clarity, you can see in this one, the edges where all three parts come together are really out of line depending on how people formed it.


Damn look at that shine. Brasso works wonders eh?
Not super smooth but it is shiny.

Marking up and initial forming.


Next step involved marking up the general outline that we anticipated (I learnt the hard way, that if you use have too much material at the start, the metal Is too hard to form - that was restart 1).
Then I used the roller, to get the general shape (don't roll too hard - because then it'll distort too much .... that was restart 2)
Bring it back

So now this is where I brought the project back to the shape to start forming. This is where the nightmare starts.
Using the sandbag, I started the shape the back bend. I got the basic shape really quickly but it needed more work.


This is where I took the opportunity to shape the edges so they begin to hug the contours of the fuel tank.

The Fuck up
So this is where it really fucked up.
I had the shape pretty much, but the back fin was just not lining up. I kept using the sandbag to try and bring the edges closer but every time I did so, it would not go the way I want or the other side would contort. Literally worked on that part for hours with almost, what felt like, no progress whatsoever.
Photos show the sticking out metal.


Tutors to the Rescue
So finally had some help from the tutors with how I should be bringing that last fin in. Apparently what I was doing wrong, as Daniel pointed out, was I was expanding that part when I needed to compress it. thanks Daniel.
So
Method 1 Daniel Method.
Use the Dolly to shrink and hammer down that side to fit the form.
Method 2 Martin's Method
Use the bowl template to shrink the metal into place.

I used a mixture of both. I started with Daniel's which was showing slow but steady progress. But I repeat - slow.
So then I moved onto martin's method. This proved to be a bit harder because it required a lot more precision that I had thought. I ended up with a bit sticking out which made it harder to form.
So I went back to Daniel's method.
Shrink time
At this point I was making slow progress, and this is where Russell found me. He had a look at my work, said my metal was worked a lot which made the metal really hard. So we resulted in shrinking the whole form.
Here come those ugly marks.


But unfortunately there isn't much you can do about the shrink marks that are left.

Shrink it til you make it
FINALLY got the metal plate to hug the contours of the tank.


As you can tell, the edges of the metal hug the contours much tighter than it did before. Most of the form was provided with the shrinker and the dolly.

I needed to use the planishing hammer to smoothen out some of the sides and knock out some minor kinks and folds that resulted from the shrinking.
"Form after Function"
Here she is.
This is what I finally ended up with once all the beating and hammering was complete and it fit the tank itself. Sure it's ugly, but it fulfils the function. Form follows.

Final Product
To smooth out the bumps I ran it through the English wheel with very little pressure as to not distort the shape. It did take some time as the force from the wheel wasn't strong and I had to slow down at the sharper curves in the metal. Overall I think it does look quite nice.
It's still got the shrink marks, which I filed down a bit to make it more uniform.


The Fit
Fitting wise, it overlapped a little with the other sides, because our edges caused curving for some and straight edges for others. Overall fit was better than others


The glamour shots

Damn look at that shine. Brasso works wonders eh?
Not super smooth but it is shiny.

Fin
Thanks to all the tutors in the course. really made this a stand out elective from FBE, definitely would recommend to others.
Comments
Post a Comment